
Rain gardens are the poster child for an emerging trend in
stormwater management called low-impact development or LID. LID stands in
contrast to conventional stormwater management approaches which focus on
collecting and moving water away from properties via drains, pipes, and
treatment facilities. The diagram below, from the University of Maryland’s
Integration and Application Network, shows a conventional stormwater situation
on the left, and a low-impact develop situation on the right.

Essentially, applying LID means thinking creatively about
where to allow water to absorb in the city or town. In a natural area, such as
a forest, there are so many places for water to go. If you’ve ever felt rain
fall from the leaves of a tree long after the rain has stopped, you can begin
to imagine how much water a forest can hold. In a city though, we have to
recreate places where water can hang out, and slowly evaporate or seep into the
ground to form our groundwater. And we need to recreate these places everywhere
we can. The water quality of our lakes, rivers and harbours will improve and
our groundwater quantity will increase only when LID is everywhere. Every
property owner needs to think about recreating these pockets for water to go.
This is where rain gardens come in. They’re the most
beautiful, simple, and fun of the low-impact development options (which also
include porous paving, more trees, green roofs, swales, rain barrels, and
infiltration trenches). Essentially just a bowl-shaped garden with amended soil
to improve drainage, they can be easily and quickly built and planted with a
wide variety of gardening goals. And a small rain garden designed for receiving
the water of one downspout of a home takes only a few hours from start to
finish!
This past June, a group of Ecology Action Centre and RBC
volunteers and members of the Bloomfield Neighbourhood Residents Association demonstrated just that on Bloomfield St in the North End of Halifax.
Many homes in the North End do not have front yards, and may only have a grassy
spot to work with in the sidewalk median. While officially city owned land,
many people garden there. We thought it was just begging for a rain garden!
 |
| The before shot. |
There’s a small house just across the sidewalk with a
downspout that needs disconnecting. When disconnected, the water will flow
across the sidewalk and into the grass. A rain garden will help ensure that the
water can be absorbed into the ground, rather than continue its path into the
street and storm drain. It is important to consider where the water actually
flows, so you can do a test with a hose if you do not want to wait for rain to
observe the flow direction. Make sure to calculate the appropriate size by
working through this information here.
Once you’ve done the
site assessment and sizing work, you can begin digging! Our first step was to
remove the sod. You can either dig it up on the day of your rain garden build,
or you can kill the grass by smothering it with cardboard over a period of a
few weeks. As you can see below, we dug it up by hand. This took us about an
hour. We used a sod-cutting edger and several digging shovels, and moved the
sod to a compost bin with a wheelbarrow. If you have an uneven site and you
need to make a berm, sod is great for building the berm.
 |
| Removing the sod. |
 |
| The garden space with the sod removed. |
Garden Bed Preparation
Once
the sod is removed, the next step is to dig the garden down so that there is a
slight depression in the middle. This is where rain will slow down and settle,
to be absorbed into the ground over the next 24 hours. You will also want to
think about breaking up the likely compacted soil with a garden fork or rototiller
if you have one. This will form more air pockets in the soil to hold water. If
your soil is very clayey, then you’ll want to add soil amendments to open up
space for water, such as sand and compost.
To
determine how deeply to loosen and amend the soil, look at the depth of the
plants you have chosen to plant. You’ll want to be able to dig a hole the
accommodate the plant’s roots and still be in nice soil. This will probably
mean loosening the soil to a depth of 6-8”. Make sure to mix whatever amendments
you add thoroughly to this loosened layer of soil.
Planting
Now
you are ready to plant. For a small garden, it is not necessary to draw a
planting plan. However, it is still important to choose your plants carefully
based on the amount of light your garden location recieves, for the climatic
zone you live in, and the unique wet-dry conditions of a rain garden. Beyond
that, you can choose the plants you want, considering things like blooming
time, colour, size, texture and function. You’ll want to decide whether you
want the garden to look full right away, in which case you will need more
plants, or whether you are happy to wait for the plants to grow and clump to
achieve a full look in a year or two.
Next,
take your plants, and set them out in their pots, and play with potential
patterns before you plant them. Keep in mind each plant’s moisture needs.
Plants that can tolerate very wet soil should go in the middle, and plants that
need to be kept drier should go on the perimeter. Once you settle on a placement
you like, go ahead and dig the holes, one at a time, to fit each plant. Make
sure that the base of the plant, where the top meets the root, is just level
with the rest of the soil. It’s a good idea to add a mix of nutrients for the
plants, such as a mixture of bone meal, and sea weed to help the plants through
transplant shock. It’s also important to water the plants in well, and to water
them once a week until they are established. Spread mulch over the garden to
hold in moisture, provide another layer of aborptive material, and reduce the
weeding you’ll have to do over time.
 |
| Rain garden right after completion. |
We
were able to have most of the plants in the garden donated from nearby gardens.
Therefore, not all the plants are native or are a particularly good fit for the
wet-dry cycle of a rain garden. If you do end up with plants like this, you can
simply place them near the edges of the garden, where the garden will have less
moisture. We did this with the donated geraniums, for example. By using donated
plants, we spent less than $70 on this small rain garden. So with a few people
working for just 2.5 hours and spending very little money, it’s possible to
create a rain garden that’s great for water, and great for making your street
more beautiful.
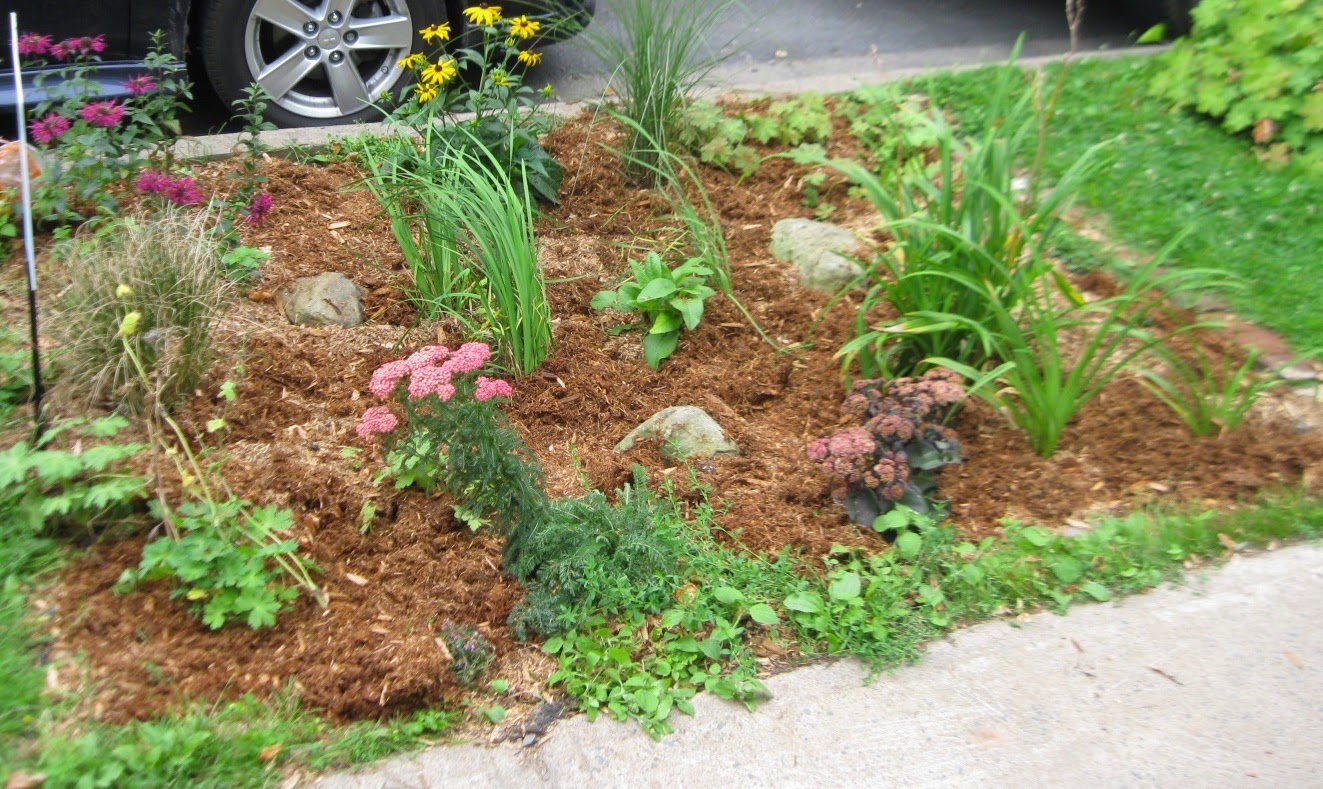 |
| Rain garden in late summer with new mulch and a few new plants. |
Great!
ReplyDeleteNice entry! This is a really helpful tip! Thank you for sharing everything from preparation to planting. I could really use this.
ReplyDeleteBell’s rain spray test environmental chamber is also known as rain spray test chamber, it is used to test the water resistance for electronic and electrical products, such as solar lights, garden lights, buried lights, tunnel lights, car lights, fountain lights, the display…etc. rain test chamber
ReplyDelete